FilmConvert Halation Kya Hai?
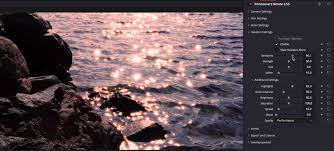
Halation ek optical phenomenon hota hai jo real film reels me dikhta tha – jab light highlights ke around red-orange glow create karta tha. Ye effect zyada tar highlights ke paas hota tha, jaise kisi face pe sunlight ya kisi white object ke edges pe.
FilmConvert Halation plugin ye hi glow digitally recreate karta hai, bina footage ko overly stylized banaye. Iska result? Ek subtle lekin cinematic softness, jo aapke visuals ko professional film look deta hai.
Key Features of FilmConvert Halation
- Realistic Halation Simulation – Natural aur film-realistic glow around highlights.
- Non-destructive Workflow – Original footage ka detail preserve rehta hai.
- Customizable Settings – Glow intensity, spread, softness sab adjust kar sakte ho.
- DaVinci Resolve, Premiere Pro, Final Cut Pro Compatible – Major video editors me support.
- FilmConvert Nitrate Integration – Agar aap Nitrate use karte hain, to dono ka combo next level result deta hai.
- GPU Acceleration – Fast rendering aur smooth performance.
FilmConvert Halation Ka Use Kaha Hota Hai?
- Weddings Footage Me – Bride/groom pe natural light glow create karne ke liye.
- Music Videos Me – Dreamy, nostalgic mood set karne ke liye.
- Short Films – Authentic 35mm ya 16mm film look dene ke liye.
- Fashion Shoots & Ads – Highlight enhancement ke liye bina harsh lagaye.
FilmConvert Halation Kaise Use Kare?
Chaliye step-by-step dekhte hain:
Step 1: Plugin Install Kare
- Official website se plugin download karein (link neeche diya gaya hai).
- Apne editing software (Premiere Pro, Resolve, FCP) me plugin install karein.
- Software restart karein.
Step 2: Clip Ko Timeline Me Import Karein
Apni video timeline me layen, jisme aap Halation apply karna chahte hain.
Step 3: Halation Effect Apply Karein
- Effects panel me jaakar “FilmConvert Halation” search karein.
- Effect ko clip par drag karein.
- Inspector/Controls panel me Halation ke settings dikhenge.
Step 4: Customize Settings
- Intensity: Kitna strong halation chahiye.
- Radius: Glow kitne area tak phailna chahiye.
- Softness: Edges kitne smooth hon.
- Color Shift: Halation ka color tone (orange/red/pink).
Step 5: Preview & Render
Effect apply karne ke baad real-time me playback karke dekhein. Jab aap satisfied ho jaayein to final output render karein.
System Requirements
| OS | Windows 10/11 (64-bit), macOS Monterey or later |
|---|---|
| RAM | Minimum 8 GB (16 GB recommended) |
| GPU | OpenCL/CUDA compatible GPU with 2GB+ VRAM |
| Software Support | Adobe Premiere Pro, Final Cut Pro, DaVinci Resolve |