FilmConvert Hazy Kya Hai?
FilmConvert Hazy दरअसल FilmConvert Nitrate का एक नया “film pack” है जो real film stock से inspired dreamy और hazy visuals देता है। ये प्रोफेशनल लुकिंग, warm aur soft highlights वाले shots के लिए best है।
इस pack में आपको मिलता है:
- Hazy white blooms
- Soft halation effects
- Dreamy tone curve
- Classic filmic grain structure
- Real film scanned LUTs
यह plugin उन creators के लिए है जो light को dreamy तरीके से capture करना चाहते हैं और cinematic feel देना चाहते हैं बिना ज्यादा heavy color grading के।
FilmConvert Hazy Ka Use Kyu Karein?
अगर आप YouTube creator हैं, wedding filmmaker, ya kisi bhi cinematic project पर काम कर रहे हैं, तो FilmConvert Hazy आपके footage को transform कर सकता है। इसके कुछ key फायदे:
- Natural और Classic Film Look: Real film stocks से inspired tone curve aur halation.
- Simple Interface: No need for complex node structures – drag & drop filters.
- Cross Platform Support: Premiere Pro, DaVinci Resolve, Final Cut Pro – sab pe compatible.
- Fast Workflow: LUT + Grain + Haze – sab ek hi plugin mein.
Features Jo FilmConvert Hazy Ko Banate Hain Khaas
| Feature | Detail |
|---|---|
| Hazy Look | Subtle bloom & glow for dreamy effects |
| Color Grade Presets | Film scans inspired, customizable |
| Real Grain Simulation | Super 35mm aur 16mm grain structure |
| Camera Profiles | 200+ camera profiles for accurate color |
| Cross-Platform Plugin | Premiere, FCP, DaVinci Resolve compatible |
FilmConvert Hazy Kaise Download Karein?
Step-by-step Download Process:
- Official Website Visit Karein:
👉 https://www.filmconvert.com - Product Section Mein Jayein:
Menu से FilmConvert Nitrate या Camera Packs पे क्लिक करें। - FilmConvert Hazy Pack Select Karein:
Hazy pack usually Nitrate plugin ke under hi hota hai. - Login / Register Karein
- Trial Ya Purchase Option Choose Karein:
Free trial bhi available hai with watermark. Full version ke liye license lena होगा। - Download & Install:
Platform-specific installer (Windows ya macOS) download करें और plugin install करें।
FilmConvert Hazy Ko Kaise Use Karein?
Premiere Pro / DaVinci Resolve / Final Cut Pro Mein Steps:
Step 1: Plugin Load Karein
- Video clip को timeline में रखें
- Effect browser से FilmConvert Nitrate या Hazy plugin apply करें
Step 2: Camera Profile Set Karein
- जिस camera से shoot किया गया है, उसका accurate profile choose करें
Step 3: Hazy LUT Apply Karein
- Plugin ke LUTs section से Hazy LUT select करें
- Intensity aur contrast adjust करें
Step 4: Grain Aur Bloom Tweak Karein
- Grain level ko real film ke हिसाब से set करें
- Hazy Bloom slider ko subtly use करें dreamy effect के लिए
Step 5: Final Touch
- Shadow, highlight, halation tweak करें
- Scope में output check करें
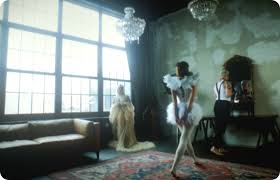
Real-World Use Cases
Wedding Filmmakers
Dreamy look, glowing highlights, warm skin tones – perfect for romantic sequences.
Travel Vloggers
Soft cinematic mood, nature shots ko enhance karta hai naturally.
YouTube Creators
Professional look bina heavy VFX ya grading ke.
Indie Filmmakers
Budget में film look achieve karne का आसान तरीका।
Tips for Better Results
- Hazy LUT ko neutral footage pe apply करें
- Overexposed footage पे bloom effect ज्यादा achha kaam karta hai
- LUT intensity ko low से शुरू करें
- Real film grain ke saath light halation use करें for subtle result